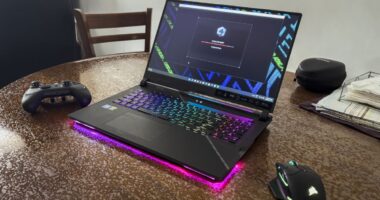
Building a gaming PC is one of the best ways to enjoy high performance, customization, and long-term value. Whether you’re a beginner or an enthusiast, assembling your own gaming machine allows you to choose the components, optimize performance, and upgrade over time. With the right parts and a clear plan, anyone can build a powerful gaming PC that delivers smooth gameplay and impressive graphics.
Understanding the Components You Need
Before assembling your gaming PC, you need to gather the essential components. Each part plays a key role in overall performance.
Core Parts of a Gaming PC
Here are the main components you’ll need:
-
Processor (CPU): The brain of the computer that handles tasks and game processes.
-
Graphics Card (GPU): The most important part for gaming performance and visuals.
-
Motherboard: Connects all components and determines compatibility.
-
Memory (RAM): Helps your PC multitask and run games smoothly.
-
Storage (SSD/HDD): SSDs load games faster and improve system speed.
-
Power Supply (PSU): Provides energy to all components; quality is crucial.
-
Case: Houses all components and provides airflow.
-
Cooling System: Fans or liquid cooling to prevent overheating during gaming.
Step-by-Step Guide to Building a Gaming PC
Once you have all the parts, you can begin the assembly process. Follow these steps carefully for a successful build.
Prepare Your Workspace
Choose a clean, well-lit area with enough space to lay out components. Ground yourself to prevent static electricity (use an anti-static wrist strap if possible).
Install the CPU and RAM
Start by placing the CPU into the motherboard socket, aligning it carefully. Apply thermal paste (if needed) and attach the CPU cooler. Next, insert the RAM sticks into the appropriate slots, ensuring they click securely into place.
Mount the Motherboard in the Case
Install the motherboard into the PC case using screws. Make sure the I/O shield is in place and the board lines up with the case standoffs.
Install Storage and Power Supply
Place your SSD or HDD into the designated drive bays. Secure them properly and connect necessary cables. Install the power supply in the bottom or top of the case (depending on case design).
Add the Graphics Card
Insert the GPU into the PCIe slot on the motherboard. Secure it with screws and connect the power cables from the PSU. The graphics card is essential for smooth gameplay and handling high-quality visuals.
Final Setup and Testing
Before turning on your PC, double-check all connections.
Cable Management and Booting Up
Organize cables to improve airflow and give your build a clean look. Once everything is connected:
-
Turn on the PC
-
Enter the BIOS
-
Check that all components are recognized
-
Install your operating system
-
Download necessary drivers
Your gaming PC is now ready for performance testing!
Conclusion
Building a gaming PC is a rewarding experience that combines creativity and technical knowledge. By understanding components and following a clear assembly process, you can create a machine that meets your gaming needs and lasts for years. Whether you want high-end performance or a budget-friendly build, creating your own gaming PC gives you control, customization, and a deeper appreciation for the technology behind great gameplay.


